
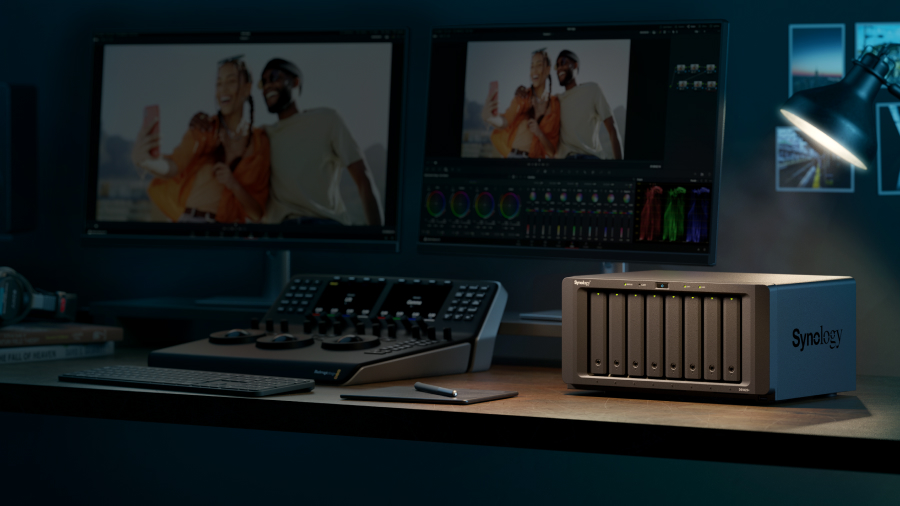
Synology DS1825+ Setup
One of many Synology NAS devices that impacts in the file management era is Synology DS1825+ NAS device.
It helps you to store storage files in seconds and secure them easily. Here you will get to know about how to complete the Synology DS1825+ setup through Find Synology interface and how to install the DSM through the Synology Assistant as well as Web assistant.
Not just the installation, we will provide you with the troubleshooting tips to make the Synology NAS setup error free.

Synology DS1875+ Setup (NAS)
Drive Connectivity
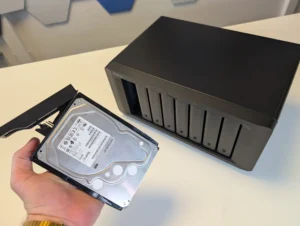
Open the box. There’s a ton of foam, screws, manuals. You’ll see the chassis, trays, power cords, and some rails if you got the rack-mount kit. Don’t lose the screws, they’re tiny, and Synology doesn’t give extras.
Pull out the trays. These little metal cages? They’re removable. Unscrew them if you’re going with 3.5” HDDs. Snap in the drives. Make sure they click. You will forget one, and it will haunt you during setup.
Flip it around. You’ve got:
- 2 x PSU plugs (redundant power FTW)
- 4 x 1GbE LAN ports (can team them later)
- 2 x expansion ports (for DX517 units)
- Console port (mostly for debugging, don’t touch unless you know why)
Hook up the power now.
Connecting DS1825+ with Router
1. Physically hook it up
Grab an Ethernet cable. Don’t go Wi-Fi on this one — it’s a NAS, wired is life. Plug one end into the DS1825+, the other into your router. Ideally, a LAN port, not WAN. Sometimes the obvious stuff trips people up.
2. Power it up
Turn it on. Wait, just wait. This thing takes a minute to boot. You’ll see those LED lights start doing their little dance. If nothing lights up, double-check the cable. Dead simple, but I’ve done it.
Connecting DS1825+ with Computer
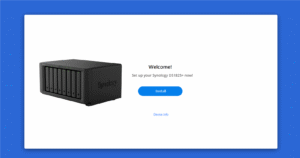
Go to your computer, open a browser, and hit find.synology.com or install Synology Assistant. It scans your LAN and should see your NAS. If it doesn’t, check your router. Some routers isolate LAN ports for security, check settings, maybe disable AP isolation.
1. Assign an IP
Don’t rely on DHCP forever. Assign a static IP to the NAS. Makes life easier later. Either set it on the NAS itself under Network settings, or reserve one in your router for the NAS MAC address.
2. Quick DSM setup
Once it shows up, hit the “Connect” button. Install DSM. It’s Synology’s OS. Takes a few minutes. Set your admin account, don’t be lazy — use a good password.
3. Test it
Ping the NAS from your PC. Open its IP in a browser. If it talks back, you’re golden. If not… check cables, check IP, check router firewall. That’s usually where it hangs.
Install DSM with Web Assistant
- On your PC, open a browser and go to find.synology.com. It should pop up in a sec. If it doesn’t, double-check your cables, network, or try a different browser.
- Click “Connect.” It’ll ask if you want to install DSM. Choose yes. Now, here’s the kicker: Web Assistant will either fetch the latest DSM automatically, or you can download it manually from Synology’s site if the auto thing fails.
- Auto install is easy: click next, wait. Manual install is basically pointing Web Assistant at the .pat file you downloaded from Synology. Make sure it’s the correct model.
- It’ll ask for a server name and admin password. Make it solid. None of that “1234NAS” nonsense. DSM installs. This can take a few minutes. Don’t unplug it.
Install DSM with Synology Assistant
- Go to Synology’s site, download the Assistant for your OS. Windows, Mac, whatever. Install it. Don’t overthink it. Just launch it.
- Plug in the NAS, power it on, connect it to your network. Yeah, Ethernet is best. Wi-Fi is a headache for this. Wait a minute or two — you want it fully booted.
- Open the Assistant. It should scan your network and show your NAS. If not, check your cables or network. Sometimes it’s stubborn. Click on your NAS when it pops up.
- Hit “Install” in the Assistant. It’ll ask for a DSM file. You can let it auto-download the latest version or use one you already grabbed from Synology’s site. Either works.
- This is the usual: set admin password, choose quick install, let it format the drives. It takes a while — 5-10 minutes usually. Don’t touch it. Seriously. Just let it do its thing.
- Once it reboots, the Assistant will show it as ready. Open a browser, hit the IP it shows, login with your new admin creds. Boom, DSM is live. Start poking around, set up your storage, apps, whatever you need.
Troubleshooting Tips: Synology DS1825+ Setup
Don’t skip the RAID check
Before you even think about storing stuff, check that your drives are all visible and healthy. Open the Synology Assistant, see if all drives show up. If one’s missing, reseat it. Don’t force it.
Network Hiccups can Cause Errors
DS1825+ loves a solid connection. Wired is best. If you’re on Wi-Fi for setup… don’t. You’ll get random errors and slow detection. Make sure your router isn’t blocking ports (5000, 5001). And yes, reboot the NAS after any network change. Just do it.
DSM installation can hang
Sometimes the web installer just… freezes. Don’t freak. Pull up Synology Assistant, find your NAS, and choose manual install. Download the latest DSM yourself. Install it, let it churn. Might take a few tries.
Drive compatibility matters
Not all HDDs or SSDs play nice. Check Synology’s compatibility list. You don’t want to find out the hard way that your new shiny drive just won’t mount.
Reset button isn’t your enemy
If the NAS gets stuck in weird states — IP conflicts, admin password lost, weird DSM errors — don’t panic. Hit that reset button (short press, not the nuclear option) and start fresh. It keeps your data, resets network and admin.
Hope you have followed all the steps given above and completed the Synology DS1825+ setup. Now, if you having any query or having any issue, you can register and resolve it through solutions without any scam.