
Synology DS1525+ Setup | NAS Installation
The Synology NAS technology and devices helps a user to control and manage the storage in the computer or laptop or any other device. It’s easy to install with your router and computer or laptop. Well there are several models of the Synology NAS Storage device one of them is DS1525+. Here the discussion is all about the Synology DS1525+ setup, its installation, DSM installation, set up QuickConnect and troubleshooting tips after the setup.
Synology DS1525+ Setup (NAS)
You should find the Ethernet cable, power cord, NAS box, some screws, drives, and user manual to make the setup complete in your home.
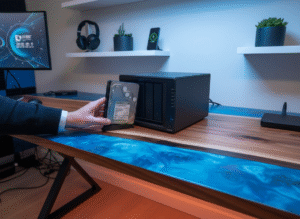
Unbox and Connect
Place the NAS in a cool, ventilated spot. Take the drives and Insert them into the trays until they click. Then simply connect the NAS to your router with a LAN cable. And to turn on plug the DS1525+ power cable in a wall socket and press the power button.
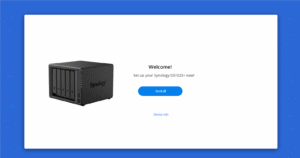
Install DSM (DiskStation Manager)
On your computer, open a browser and go to find.synology.com. The wizard will detect your NAS automatically. Click “Connect” and choose “Set up.” Install the latest DSM version. Let it reboot when done.
Create Your Storage
Log into DSM using the admin account you just made. Open Storage Manager. Create a storage pool, then a volume. Choose the right RAID type — SHR is great for most users.
Enable File Services
Now you have to enable the Files services into the NAS device. For that go to the Control Panel and then click the File Services option. Turn on SMB for Windows, AFP for macOS, or NFS for Linux. Create shared folders and user accounts in Control Panel > Shared Folder.
Access Your NAS
For local access, use the NAS IP address in your browser. For remote access, enable QuickConnect or set up DDNS.
How to Setup Quickconnect for Synology DS1525+ Setup?
Power up and connect
Plug in your DS1525+. Link it to your router with an Ethernet cable. Turn it on. On your computer, open a browser and go to find.synology.com.
Log into DSM
Once your NAS shows up, click Connect. Follow the DSM setup prompts. If it’s your first time, install DSM and sign in.
Open QuickConnect settings
In DSM, go to Control Panel → External Access → QuickConnect. If you don’t see it there, open Control Panel → Connectivity → QuickConnect instead.
Sign in with Synology Account
QuickConnect works only when linked to a Synology Account. Click Log in or Register. Enter your details or create a new one. Your NAS will then link to that account.
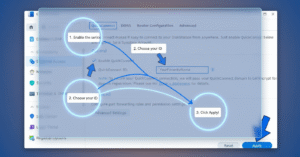
Enable QuickConnect
Check the box Enable QuickConnect. Create a QuickConnect ID — something short and easy to remember and click Apply.
Test remote access
Once it saves, you’ll get a link like https://quickconnect.to/yourID. Open that link from your phone or another network (not home Wi-Fi). You should see your NAS login page right away
So, this is the end of the Synology NAS setup for the model DS1525+. Now, you should learn some of the troubleshooting tips so that the setup can have an error free completion.
Synology DS1525+ Setup: Troubleshooting Tips
NAS Not Detected
- You have to check that both DS1525+ NAS and PC are on the same WiFi network.
- You should disable VPNs or firewalls temporarily.
- You can try Synology Assistant if the web tool doesn’t find it.
Slow Performance
- Check drive health in the Storage Manager.
- Turn off unused services.
- Upgrade RAM if needed.
Drive Warning or Failure
- Replace only one failed drive at a time.
- Wait for the rebuild to complete before swapping another.
Can’t Access Shared Folders
- Verify the user has permissions.
- Recheck network drive mapping on Windows or macOS.
DSM Not Updating
- Confirm stable internet access.
- Try manual installation from Synology’s Download Centre.
Now that you have learned about how to complete the Synology DS1525+ setup and its troubleshooting tips, you can register issues related to it here so we could help you more.