How to Setup Synology WiFi Router in Minutes?
Don’t you know how to install a new Synology WiFi router in your home? It is pretty easy and simple. Our guide makes it more simple. You just have to just follow all the steps one by one and complete the Synology WiFi router setup. This guide includes: Physical connection with your home modem, method one for the setup (computer) and method two for the setup (phone). So let’s dive into Synology router setup.
Synology WiFi Router Setup
There are two methods to complete the Synology WiFi router setup, one is through the web interface on your computer & other is through an App on your phone. Let’s learn both.
Physical Setup
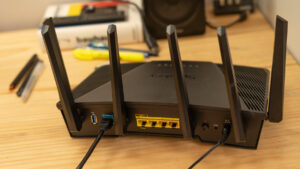
Take your Synology WIFi router, plug in the power. Grab an Ethernet cable, connect the WAN port on the router to your modem. Make sure the modem’s on and stable.
Grab your laptop or start your computer. Either plug it into one of the LAN ports on the router or enter into the default WiFi (SSID and password usually printed on the back of the router). That’s it. You’re physically online. Everything else, network name, password, security comes later in the software setup.
Configuration through Computer
1. Plug it in and connect
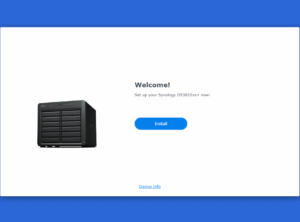
Get your Synology router out of the box. Plug it into power and your modem. Then, grab a laptop or desktop and connect it to the router with an Ethernet cable. WiFi works later, for now, hardwired is simpler.
2. open up a browser
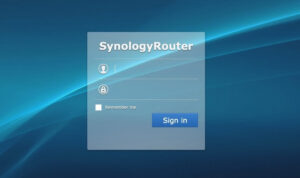
Open Chrome, Edge, Firefox or any other. In the address bar, type 192.168.1.1 or router.synology.com. Hit enter. You should see the setup page. If nothing pops up, double-check the cable and power.
3. Create admin account
It’ll ask for a username and password. Make it something you’ll remember but not “admin/admin” (please, don’t do that). This account runs the router, so make it solid.
4. Check for firmware updates
Synology usually ships with slightly older firmware. There’ll be a “Check for Updates” button. Hit it. Install anything it finds. Don’t skip this — it fixes bugs and security holes.
5. Name your WiFi
Go to the Wireless settings. Give your WiFi a name that makes sense to you. No weird default names like “Synology_1234” — you’ll forget it. Set a password. Make it strong. Something you won’t forget but also not “password123”.
6. Choose your WiFi band
If your router supports dual-band, you’ll see 2.4 GHz and 5 GHz. 2.4 goes farther but slower. 5 is faster but shorter range. Pick names for both so you can tell them apart later. Usually, people just stick “_5G” on the 5 GHz one.
7. Save and reboot
Hit “Apply” or “Save.” The router will restart. Wait a few minutes. Then, disconnect the cable if you want to use WiFi. Your laptop should see your new network. Connect using the password you just set. Done.
Configuration through Phone
1. Plug it in and power up
Grab your Synology router, plug it into the wall, and connect it to your modem. The LED should light up. Wait a minute.
2. Grab the DS Router app
Open App Store or Google Play. Search “DS Router” and install it. Yeah, Synology makes it confusingly named, but this is the one.
3. Connect your phone to the router
Look for the default WiFi name on the back of the router or the quick-start card. Connect your phone. No password yet? Some models leave it blank, some give one on the sticker.
4. Launch the app and detect the router
Open DS Router. It should auto-detect the router on the network. If not, hit refresh. Sometimes it takes a second.
5. Set up your admin account
The app will ask for a new username and password. Make it something you’ll actually remember. Don’t just slap “admin/admin” and forget.
6. Create your WiFi SSID and password
This is where you name your network and set the WiFi password. Pick something short enough to type easily but strong enough to not get hacked in five minutes. Hit save.
7. Finalize and test
The router will reboot. Once it comes back online, reconnect your phone to the new WiFi you just made. Open a browser, load a website, and make sure it’s working. Done.
Troubleshooting Tips: Synology WiFi Router Setup
Check the Basics First
Make sure your modem is actually online and your router is plugged in correctly. Power cycle both devices while you’re at it, just unplug, wait 30 seconds, plug back in. It fixes more than you think.
Log In to the Admin Panel
Hit router.synology.com or your router’s IP. If it doesn’t load, forget Wi-Fi plug in via Ethernet. Seriously. Default username/password? It’s usually admin/admin unless you change it. If you can’t get in, reset the router.
Update Firmware, No Excuses
Synology is decent, but the first thing you should do is check for firmware updates. Outdated firmware = weird bugs. Go to Control Panel → Update & Restore → Check for Updates. Do it. It takes five minutes but saves hours of weird network behaviour later.
Double-Check Network Settings
DHCP on? Static IP conflicts? NAT set correctly? Look, networking is messy. Go slow, write down what’s already there before you change anything. Messing up here can kill your internet entirely until you fix it.
Test & Isolate Problems
After setup, unplug everything unnecessary and test one device at a time. If Wi-Fi is flaky, test wired. If wired fails, maybe the modem or cable is shot. Keep logs or screenshots. It helps when you inevitably call support or post on forums.
Finals Thoughts
Hopefully this Synology WiFi router setup guide has helped you in installation. But even after you have any problem, just fill the register form for more help. Our experts are here for help every minute.