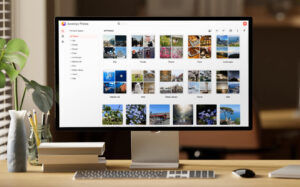
How to Store Photos in Synology NAS Drives?
Synology Photos: think of it as your own private photo vault sitting in your house. No subscriptions, no third-party nonsense, just you controlling everything. But here’s the part nobody tells you: getting your photos actually into the NAS and setting it up is pretty easy. If you are struggling with it just follow this guide “how to store photos in Synology NAS drives”.
1. Start up the NAS
Plug in your Synology, connect it to your router with an ethernet cable. Power it up. If the lights look weird, don’t panic, give it a minute.
2. Log into DSM
Open your browser and punch in find.synology.com. That should land you on the DiskStation Manager (DSM) login page. Use your Synology assistant admin account. If it’s brand new, you’ll set that up here.
3. Create a Shared Folder
This is where your photos will live. Head into Control Panel > Shared Folder > Create. Name it something like “Photos”. Hit apply.
4. Set Permissions
But if family or co-workers need access, go into permissions and give them read/write rights. Nothing worse than someone complaining they “can’t upload.”
5. Install Synology Photos or Photo Station
On DSM, crack open the Package Centre. Install Synology Photos. That’s their modern app for organizing pictures. If you’re nostalgic, Photo Station’s there, but honestly, just go with Synology Photos.
6. Upload Your Pictures
You’ve got options:
- Drag and drop through the web interface.
- Sync a folder from your PC using Synology Drive Client.
- Use the Synology Photos mobile app to auto-upload from your phone.
The mobile app is a lifesaver if you’re tired of running out of phone storage.
7. Check Access and Enjoy
Once uploaded, jump into the Synology Photos app (web or mobile). Everything should be there, neatly organized. If something’s missing, double-check the upload path. Don’t freak out, it’s usually just a sync setting or permission slip-up.

Now, if you are struggling with any kind of issue, use these troubleshooting tips down here. Also, in case of learning about Synology routers or beeline station devices, visit Synology Find.
Troubleshooting Tips About Synology Photos
1. Photos not showing up after upload
The “Photos” folder, and Synology Photos just acts blind. What worked for me was going into the Control Panel → Indexing Service and forcing a reindex. Sometimes DSM just doesn’t kick it off automatically. Just hit reindex and give it a few minutes.
2. Mobile app refusing to sync
The app says uploading. It turned out my phone was trying to upload on mobile data, but I had Wi-Fi-only upload enabled. Flip that toggle or reconnect to Wi-Fi. Worst case, log out of the app and back in. That usually forces it to refresh permissions.
3. Thumbnails missing or broken
If you see a bunch of Gray boxes instead of previews, your NAS probably ran out of thumbnail cache space. Open File Station, go to the shared folder where your Photos live, and clear any junk. Then, in Synology Photos settings, rebuild thumbnails. It’s slow, but it works.
4. Permissions mess
If you can see the photos on admin but not on your user account, it’s not a bug—it’s permissions. Go to Control Panel → Shared Folder → “photo” → Permissions. Make sure your user or group has read/write access. Also check Synology Photos’ own user settings.
5. Random crashes or slow loading
When Synology Photos starts crawling, 9 out of 10 times it’s your database choking. Go into the Package Center, stop Synology Photos, then restart it. If that doesn’t help, clear the browser cache if you’re on the desktop. On mobile, close the app and reopen. Sometimes it’s not your NAS.
Still struggling with issues, fill up the Issue form and register it through your email. We will address it quickly.
