
Synology DS3622xs+ Setup
The DS3622xs+ Synology NAS is a big file & storage management device which you can use to store images, pictures and many files. This post is all about how to complete a new Synology DS3622xs+ setup just by following steps:
- Hardware setup: provide steps to join your drives and power to your NAS.
- Connection with router & computer: provide steps to connect with the router via cable and computer via Synology Web assistant.
- DSM installation: a Software to manage the Synology NAS settings which you can install through Synology Assistant or web assistant.
- QuickConnect Setup: A feature of the Synology NAS that you can set up through the DSM login credentials.
- Troubleshooting tips: to make the setup error free and quick.
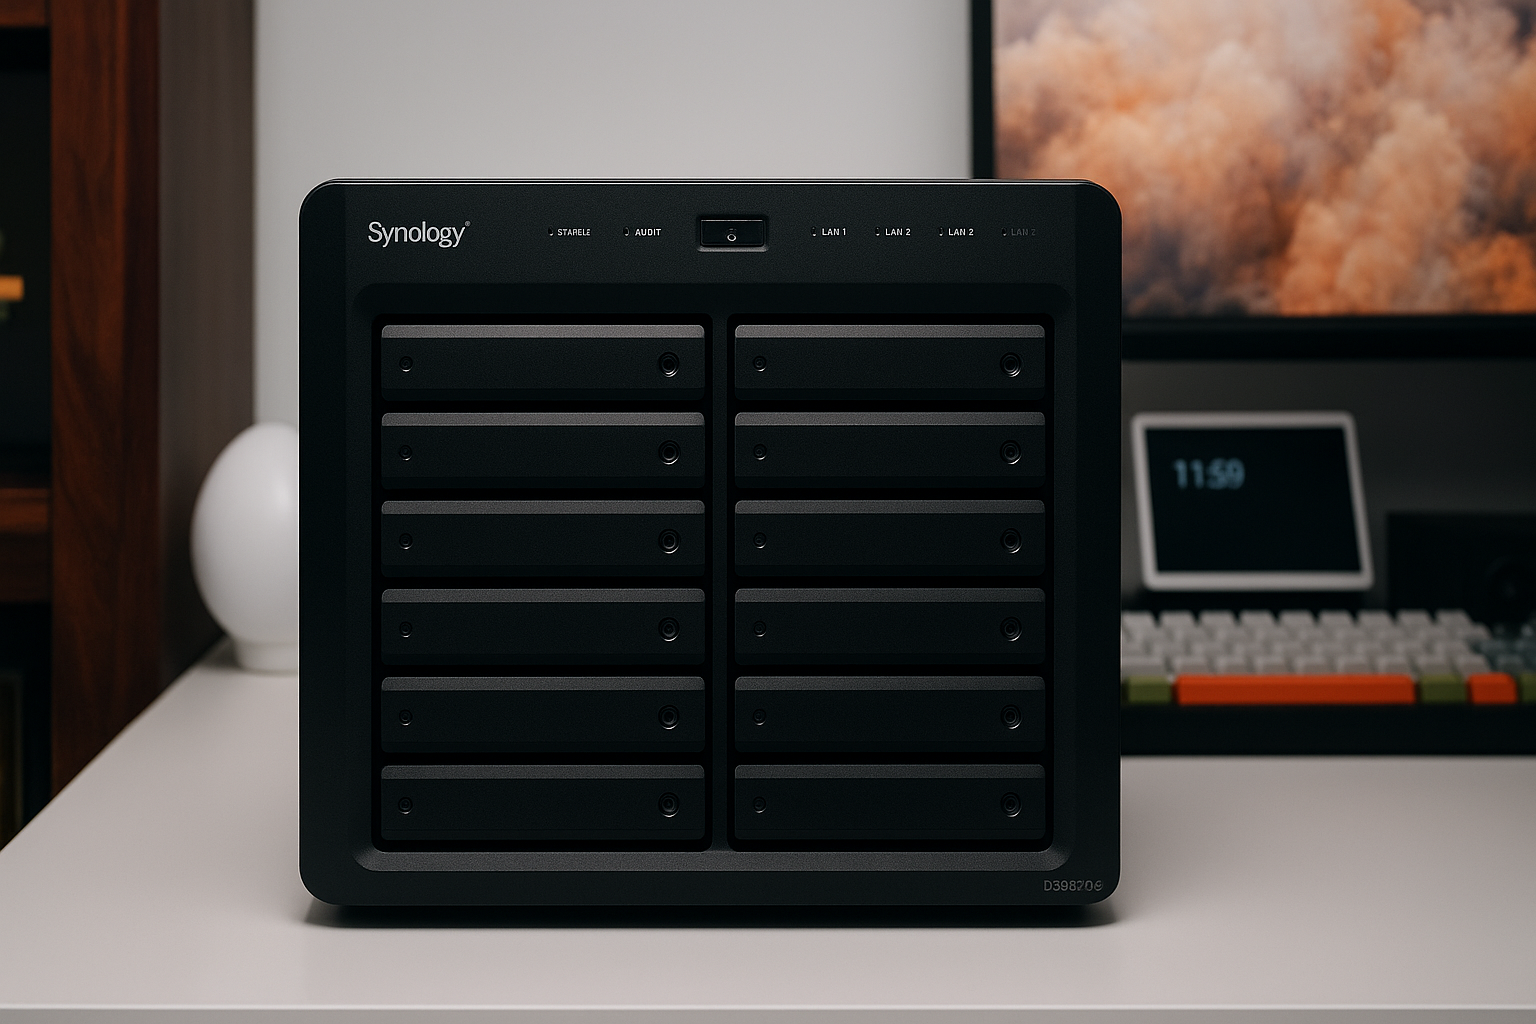
Hardware Setup
It comes with rails. Don’t skip reading that tiny instruction sheet, because these rails can be sneaky. The metal tabs have to click in the right way, and yes, the screws are tiny. You’ll probably drop one, curse, and then find it under the server a week later.
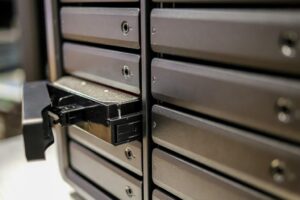
Drives
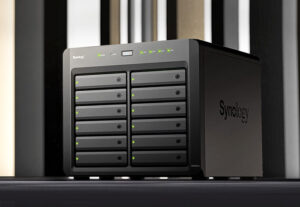
The DS3622xs+ can take a bunch of drives. 12 bays for 3.5”/2.5” HDDs or SSDs, plus a couple more NVMe slots if you want more cache speed. Pull out the trays. You’ll see the little plastic tabs. Pop the drives in. Then slide them back in. They click when means they are connected properly.
RAM/expansions
If you got extra RAM, install it now. There’s a small panel on the back. Push the little clips aside, slot it in, hear the click. Don’t force it. You’ll know if it’s in.
Networking
There are 4 10GbE ports on the back. Decide if you’re going straight to your switch or doing link aggregation. Plug them in, but don’t panic if you see some lights blink weird. It’s fine.
Power
Two power supplies. Dual redundancy. Plug them both in. Hit the power button. Wait a couple minutes. Lights will blink, fans will spin, means its on.
Connection with Router & Computer
With Router
Make sure you’re using proper Cat6 or better Ethernet cables. Connect the cable into LAN ports, not WAN. Plug in, power up the NAS. Wait. It takes a minute or two to boot. Connect the cable’s other end with the NAS Ethernet port.
With Computer
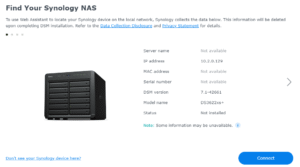
Connect the computer with the same router with which is connect with the Synology NAS. Then, go into the web browser, enter this: find.synology.com and search it by pressing enter. The Synology web assistant will open up. Here, find your NAS model name and click Connect button. Your computer will connect with the NAS, then you can easily manage your memory.
Install DSM on Synology NAS
- On your PC, open a browser and go to find.synology.com.
- When it shows up, click Connect. You’ll see something like “Install DSM.”
For manually installation:
- Go to their Download Centre → choose DS3622xs+, grab the latest DSM .pat file. Save that on your desktop.
- Back on the setup screen, hit Manual Install. Upload the .pat file. Hit Next. It’ll warn you it’s going to wipe your drives.
- Click through. Then it’ll start installing — formatting drives, installing DSM, rebooting once or twice. This part takes like 10–15 minutes.
Once it reboots, it’ll land on a new screen asking for a server name, admin account, and password. Do that.
QuickConnect Setup
- Go to Control Panel → QuickConnect. If it’s your first time, it’ll ask you to sign in or create a Synology Account. Do that. You can’t skip it.
- Once you’re logged in, tick the box that says Enable QuickConnect. Then it’ll ask you to create a QuickConnect ID
- Hit Apply. DSM will sit there for a bit doing some background handshakes with Synology’s servers. If it fails, it’s usually because of DNS or time sync being off.
- Once it finally says “QuickConnect is enabled,” copy your QuickConnect URL. That’s the one you’ll use to reach your NAS outside your home network.
- Test it from your phone or a different network. Go to https://quickconnect.to/yourID. Log in. If it loads DSM or the web portal, you’re good.
Troubleshooting Tips: Synology DS3622xs+ Setup
1. Can’t Find It on the Network?
Open Synology Assistant or just hit find.synology.com in your browser.
If it doesn’t show up, check your router’s device list. Sometimes the NAS grabs an IP that’s not in range or the DHCP server’s being a pain.
Also — and this happens a lot — bad Ethernet cable or wrong port. The DS3622xs+ has multiple LAN ports; try LAN1 first and plug directly into your router or switch.
2. DSM Install Keeps Failing
If the web assistant keeps timing out during the DSM install, clear your browser cache or switch to another browser (Chrome hates the installer sometimes).
If that still fails, grab the DSM .pat file from Synology’s site and do a manual install.
Bonus tip: use a wired computer for setup. Wi-Fi drops mid-install are brutal.
3. Drive Initialization Takes Forever
You’ll see that “Initializing” spinner for hours — that’s normal.
If it’s stuck for more than a day with no CPU or disk activity, cancel the array and re-create it. Use SHR (Synology Hybrid RAID) if you’re not doing anything fancy. It’s forgiving and way faster for first-timers.
4. Fan Noise or Beeping Won’t Stop
New setup = constant beeps. Usually, it’s DSM nagging you about missing volumes, bad drives, or just wanting you to create storage pools.
Log into DSM → Control Panel → Hardware & Power → Beep Control. You can mute it while you finish setup.
5. Can’t Access It After Reboot
You set everything up, reboot, and poof — it’s gone.
That’s usually because DSM switched network interfaces or changed the IP.
Log into your router, find the NAS by its MAC address, and lock it with a static IP so it doesn’t play hide-and-seek every reboot.
You can also assign it directly inside DSM under Network → Interface → Edit → Manual IP.
This is the end of the Synology DS3622xs+ setup procedure. Now, if you are struggling with any error or problem, you can register that issue here and find solutions in less than an hour.